Using Bearer Tokens
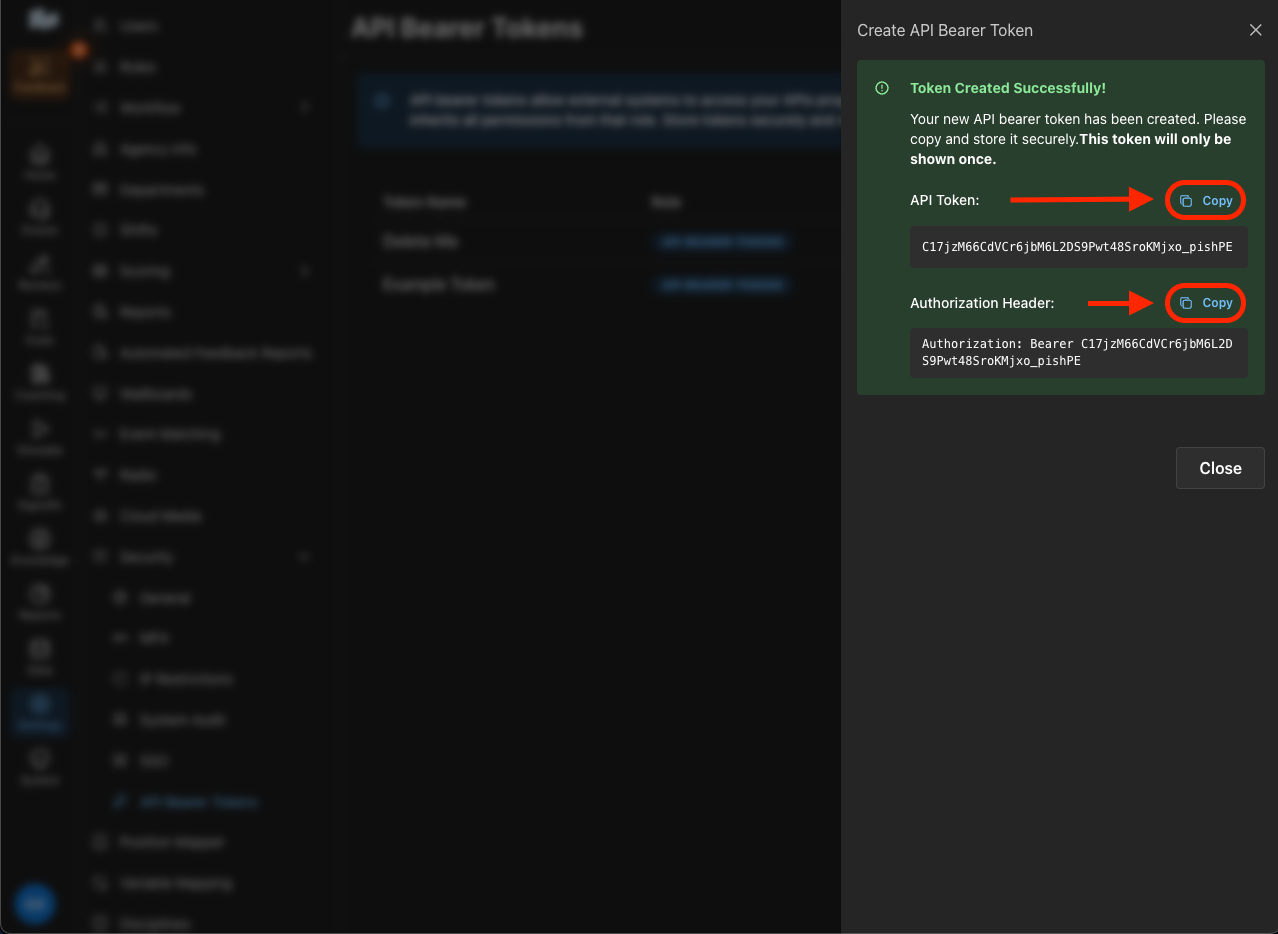
Agencies will create a Bearer Token that should be used on all RESTful requests. Add in an Authentication header that looks like the below.Authentication: Bearer <TOKEN>
Creating a Bearer Token
To create a Bearer token you will need to login into the GovWorx administration area with System Administration privileges.Step 1: Role Privileges to Manage Bearer Tokens
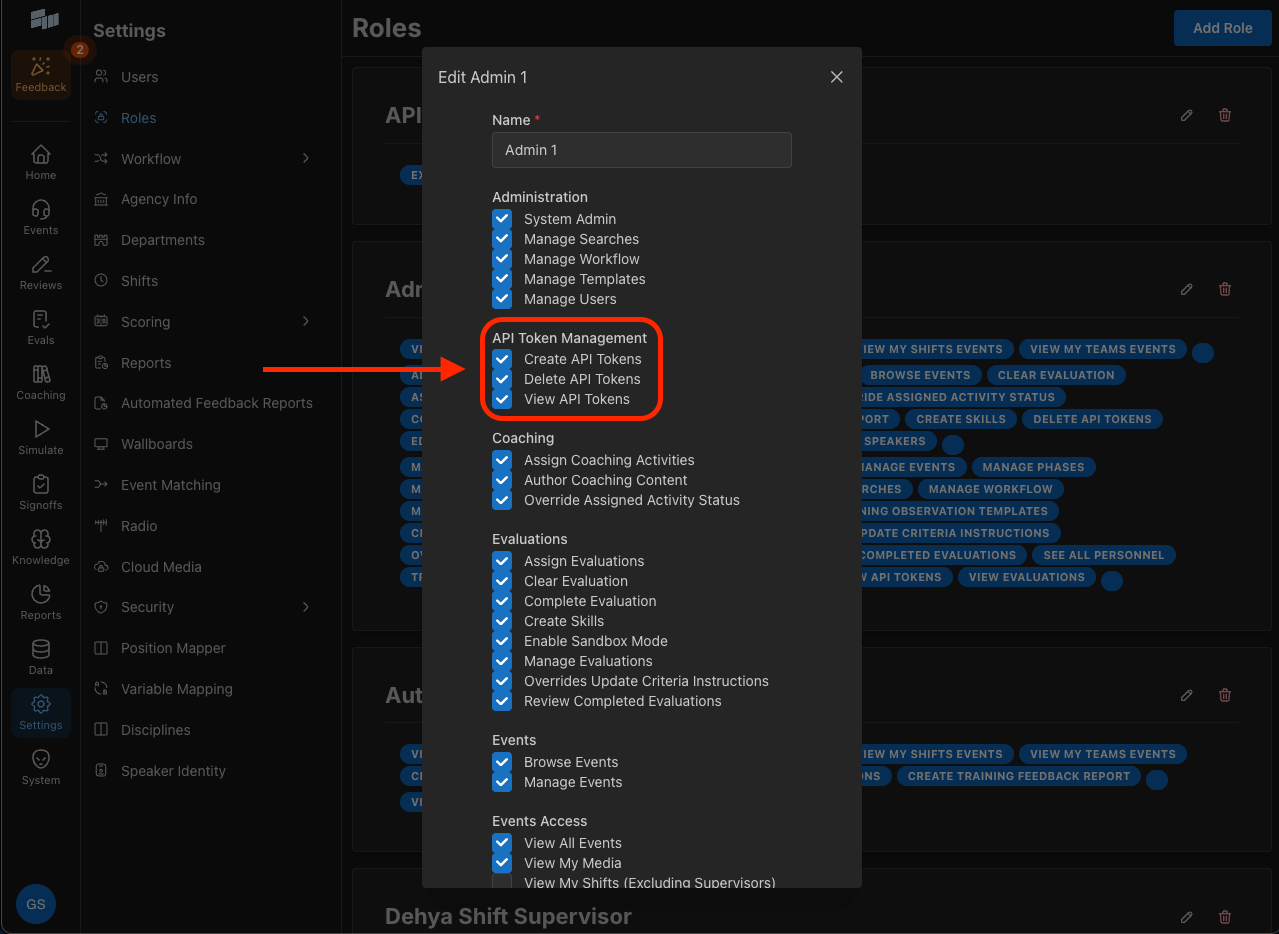
Configure a user role inSettings → Roles that will be able to manage API bearer tokens - there are 3 permissions associated with the viewing, creation, and deletion of tokens:
API Token Management
-
Create API Tokens- Enables the user to access the dialog to create new API tokens -
Delete API Tokens- Enables the user to access the dialog to delete existing API tokens -
View API Tokens- “Parent” permission enabling API Bearer Tokens settings page
Step 2: Role Permissions - Token:
You can tie various permissions to the Bearer Token to restrict access to various parts of the API.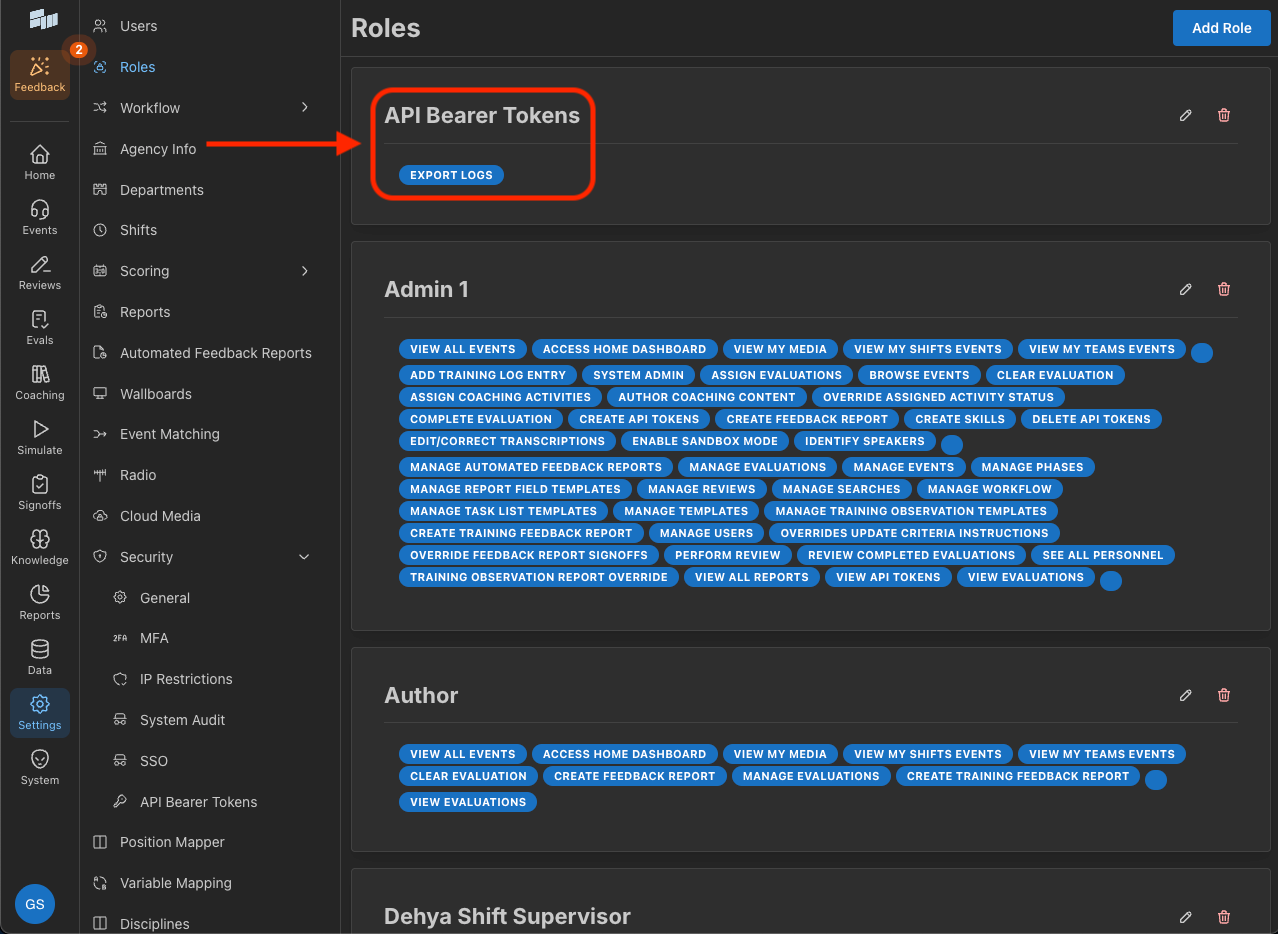
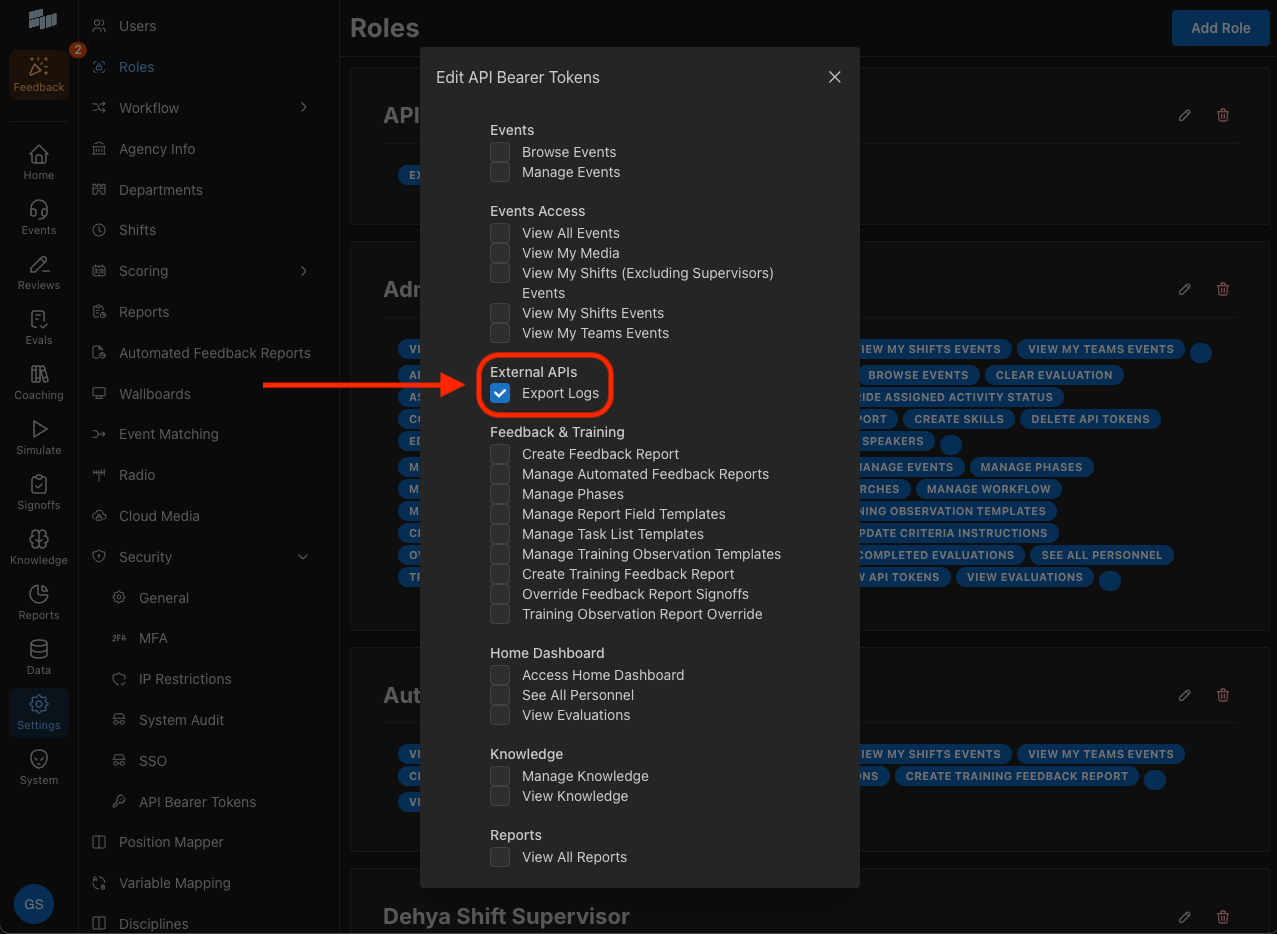
Step 3 - API Bearer Tokens Page
Provided that the user is now in a role that is capable of managing API Bearer Tokens (at least has the permission toView API Tokens), the user can now access the page to manage tokens by navigating to Settings → Security → API Bearer Tokens:
Create API Tokens, Delete API Tokens, View API Tokens). There is a “Create Token” button in the top right to open the dialog for creating a new token (this button being present is dependent on the permission - Create API Tokens). There is also a small red trash icon on the far right column of the “Delete Me” example token (this icon being present is dependent on the permission - Delete API Tokens).
Step 4 - Create a New Token
To create a new token the user will click “Create Token” and the dialog below will open. The user MUST at least define a unique “Token Name” and a “Role” for the token (make sure you use an API Bearer Token specific role, like mentioned in Step 3). The user can also give the token a “Description”, which is recommended for keeping track of a token’s use case.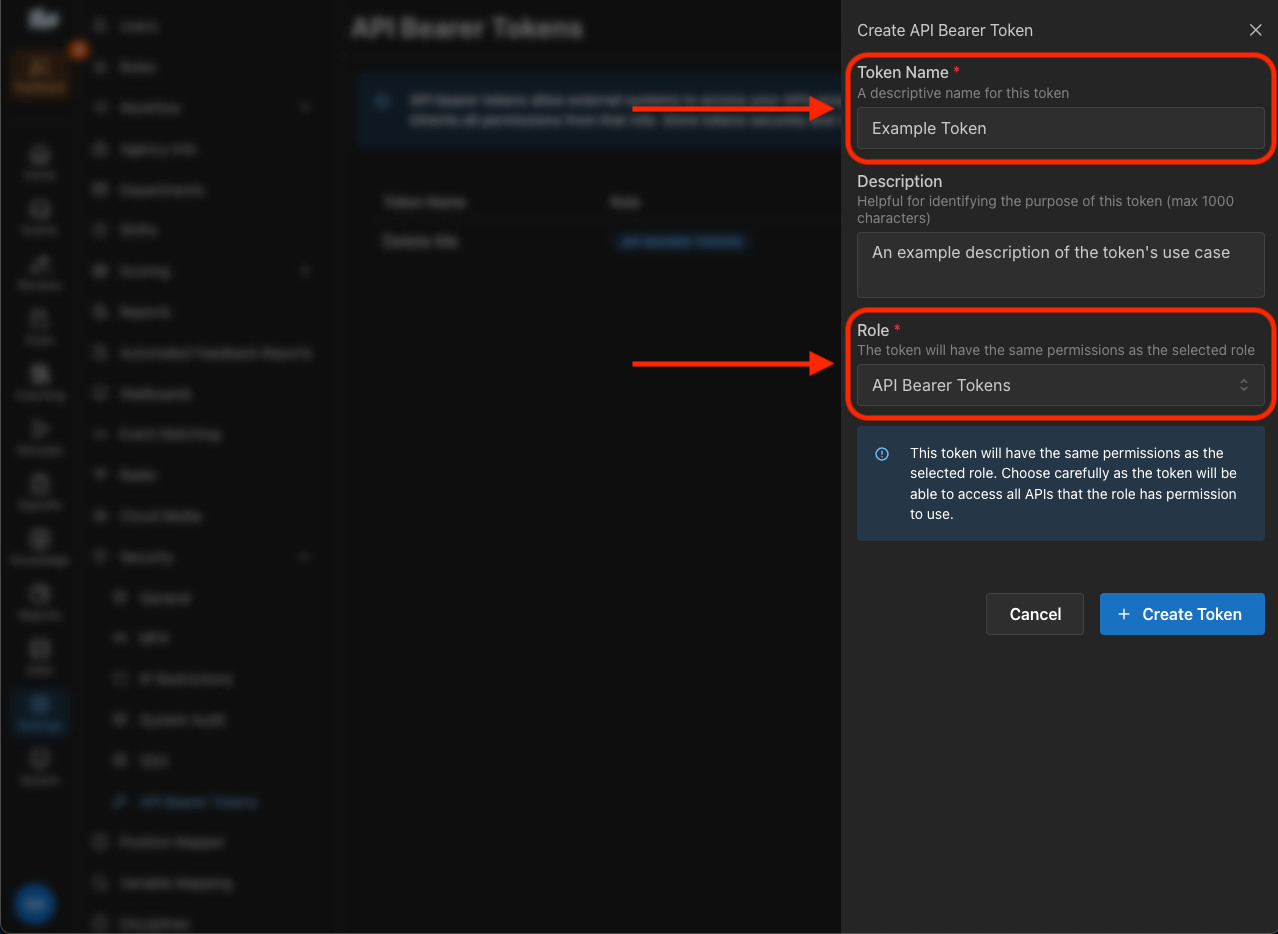
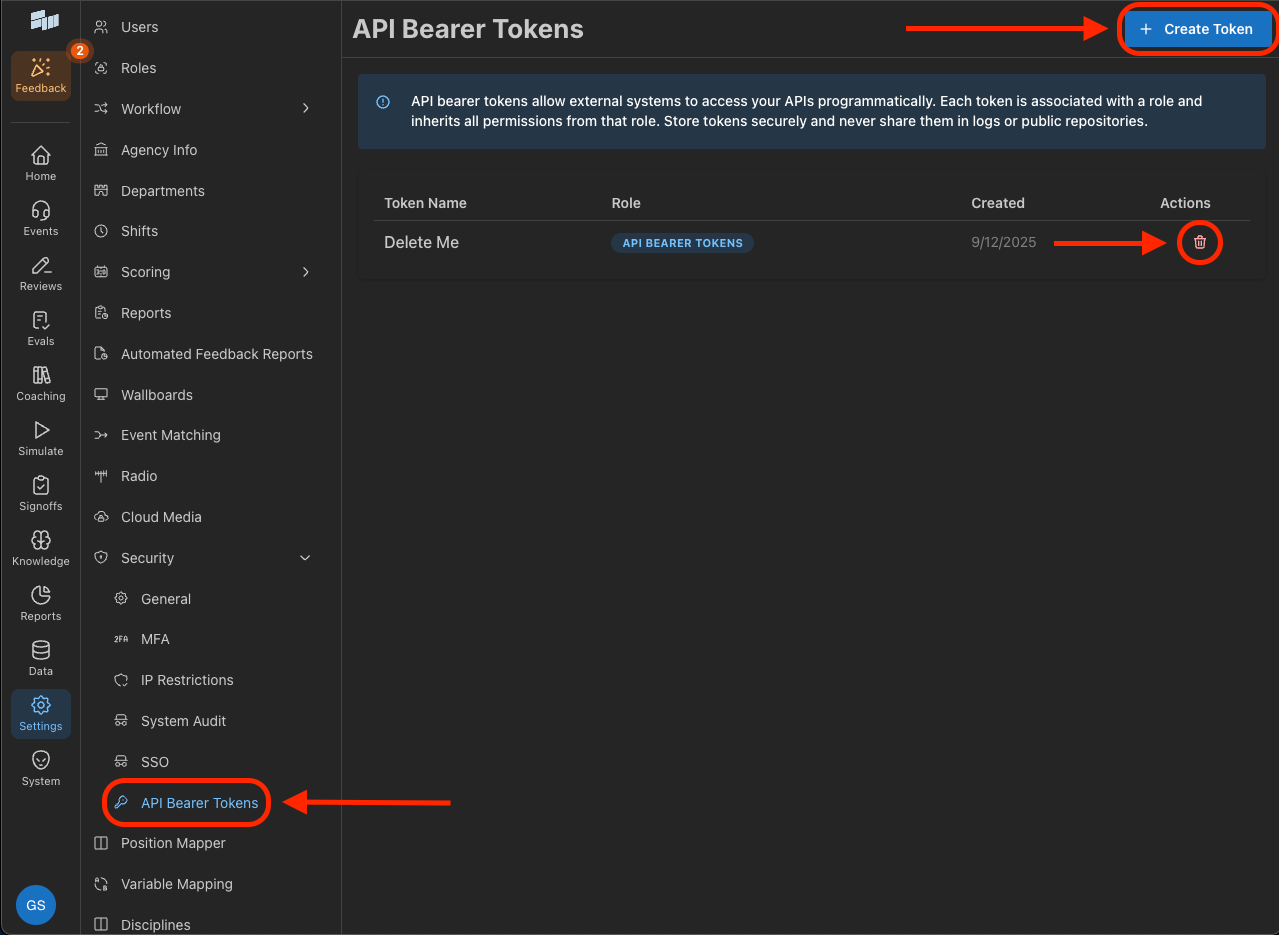
Optional Step - Deleting Bearer Tokens:
Going back to the permissions for the user that were discussed earlier, if the user has delete permissions, then they can delete tokens in the UI. Tokens that are deleted then become deprecated and can no longer be used to access system logs externally. The steps below show the process of deleting bearer tokens: